Planning Geometry Notes

I’ll be teaching Geometry for the first time this year. Actually, everything is for the first time this year, as I’ve never taught discrete high school math subjects before*. It feels like I’m starting from scratch with my planning.

I’ve already posted my list of Geometry units and skills, mapped to the new math standards that Oklahoma is introducing. (I’ve done my Algebra 2 units too. I really need to get around to posting those.) Recently, I’ve been working on filling out a bit more of the details of what I’ll be teaching. I don’t plan on making too much use of the textbook, but I still want a list of the definitions, postulates and theorems written out. So, that meant making the list myself.

Downloads:

To be clear, this is not a document I’m giving to my students. This is for me, to make sure that my students are getting all the background knowledge they need as we progress through the course. There are still the day-to-day decisions about how I’m going to introduce these concepts in class, and how we will take INB notes each definition and theorem. I am very keen, though, to have students proven many, if not most, of these theorems themselves.

I’m considering this a first draft. I tried my hardest to make sure that everything that needs to be there is, but I’m not guaranteeing it. I would love feedback about anything, whether something could be worded a little more clearly, or there’s a giant hole of content that I’ve missed completely. I know I’ll be revising this document throughout the year.

* You could read this post and change every ‘UK’ or ‘Britain’ to ‘Australia’ and get a pretty good idea of what I’m used to.


Perfect Cubes Images

You may have seen Sarah’s recent post about making posters of perfect square and cube numbers. She was talking to me about how she would go making the cubes. I thought about it for a bit, and thought there must be some way to do it in Geogebra. Turns out, there is!

Drag that slider, and you can change the number of cubes from 1³ to 20³.

This took a little bit of messing around to get right, mostly because I’ve never used the spreadsheet view in Geogebra before. Once I worked out that spreadsheet cells can contain graphical elements that get displayed, it was just a matter of plugging in the right formulas to generate all the lines.

Anyway, if you’d find this useful, you can download the file here:


Geometry Symbols Posters

Firstly, my recent exciting news that I don’t think I’ve blogged about yet:

  • I have a job at the same school as my wife! 😀
  • I have my own classroom! This was in doubt for a while, as it seemed I might need to be a roaming teacher (which didn’t bother me that much, because we all had to roam when I was in Australia.) But people got shifted around, and it turned out there was a room free.
  • My teaching certification for Oklahoma finally came through last week!

The result of all that is that I’m teaching Geometry and Algebra 2 next year, and I have an empty classroom with no posters. Well, had an empty classroom. I’m working on that. 🙂

Here’s my set of Geometry Symbols posters. Sorry about the glare. I’ve never taught “Geometry” as a single subject before. In Australia, maths is still integrated through high school, so there’s just a little bit of geometry each year. So I found it very useful going through the units I have planned, figuring out what specialized symbols students will need to learn to take Geometry as a class. And putting them onto posters helps add a bit more color to my room.

Downloads are here:

Font is Arvo.

1

2

3

4

5

6

7

8

9

10

11

12

13

14

15

16

17

18

19

20

21

22


Approximating Areas Interactive

Another coding project to share today: an online interactive for demonstrating the areas under a curve for a Riemann sum.

I started work on this a couple of months ago, then forgot about it. I’m probably not teaching Calculus in the near future, so I lost some of my enthusiasm for completing all the ideas for this project. But given the work I’d already put into it, I thought it would be worth sharing what I’ve got anyway.

You can find it here: https://www.primefactorisation.com/areaapprox/

I might come back to this at some point. Let me know if you’ve got any suggestions, or any functions you’d really like me to add to it.

I’ve also done this concept as an activity involving cutting and pasting.


Building My Planner

Designing your own planner? Pay attention to the end for some files that may save you a lot of work.

Both Sarah and I have been working on our planners for the next school year. We’re both using the Staples Arc system to completely customize them. Sarah’s already blogged about starting to design hers. Here’s what I’ve been working on.

At my last school, all teachers were provided with a planner. While we were given the choice from a catalogue of the exact planner we wanted, I could never make it work in a way that suited me. Most planners have spaces for each class in a single day on the same page, but I don’t like having all my subjects mixed up together. I want to have a separate section for each subject, with all my notes, lessons, grades and everything else for each subject self contained away from the other subjects.

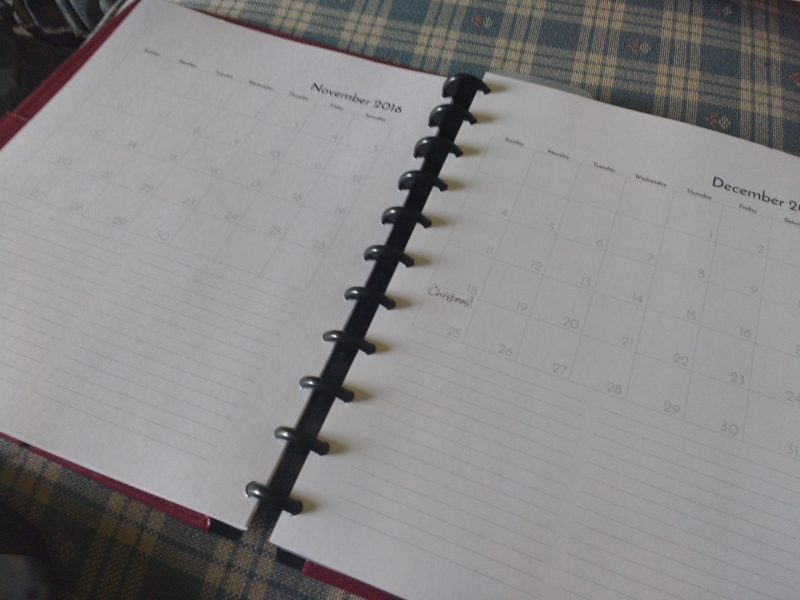
So far I have calendar and planning pages, consisting of monthly pages,

weekly pages (for non-subject specific information, as well as non-school stuff),

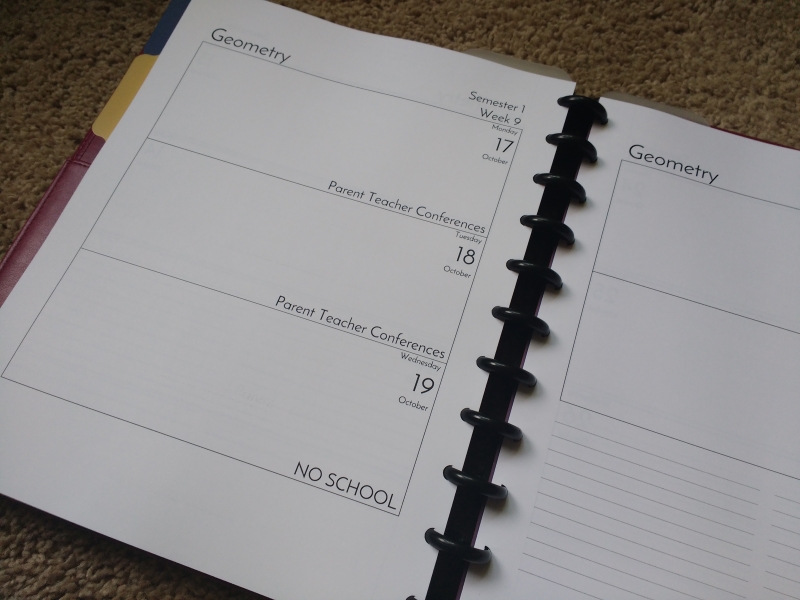
and lesson planning pages.

I’m still not sure how well this layout will work, but I’m going with it for now. One downside of having two pages for a week for each subject is that it makes my planner very thick and heavy. But I had the realization that I don’t actually need to put every page in the planner at once. Since Arc lets you add and remove pages at will, I’ve only put the first semester in my planner, and bought another set of rings to store my spare pages.

The secret to getting all the dates on my pages was using a mail merge. Here’s what you need to do if you want to do the same (and save yourself a lot of time).

Step 1. Download this file and open it in Microsoft Excel:

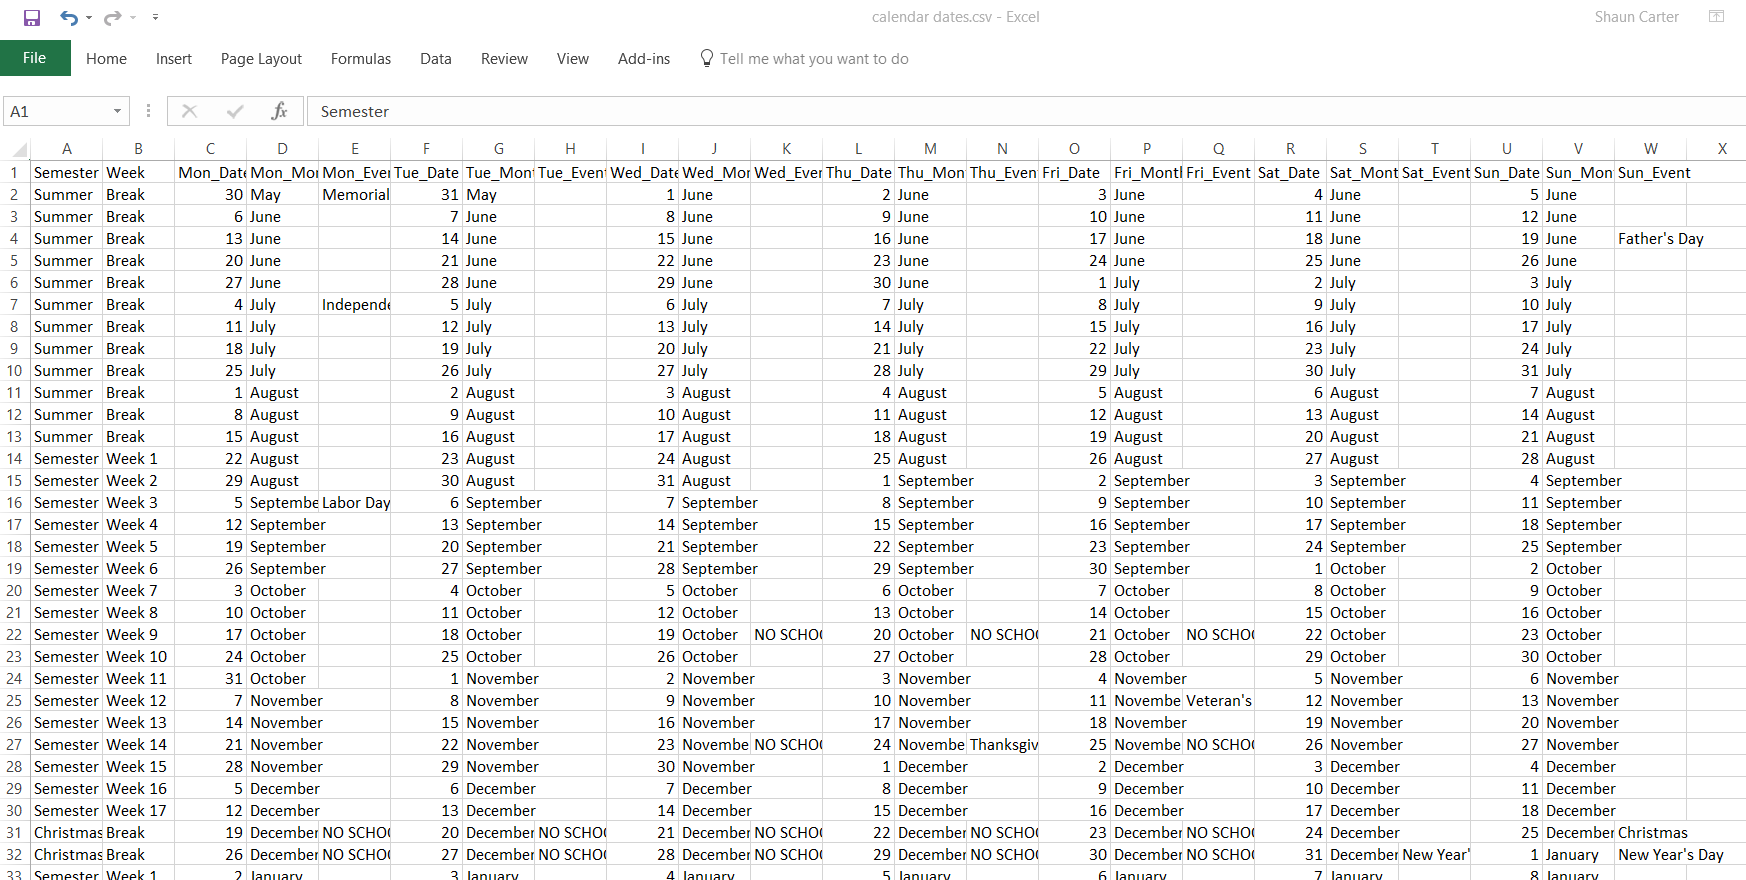
Step 2. Each row represents a week on the calendar. Customize this data so that it suits your school year, and how you want it to display in your planner. Delete any rows for weeks you don’t want. For instance, my subject planning pages don’t include any of the breaks. I’ve also included a bunch more school specific events, such as professional days and parent/teacher conferences, in my own planner. There’s actually more weeks there than I used, as my planner stops at May 2017. It’s completely up to you. Make your changes, save the file, and close it.

Step 3. Download one of these files:

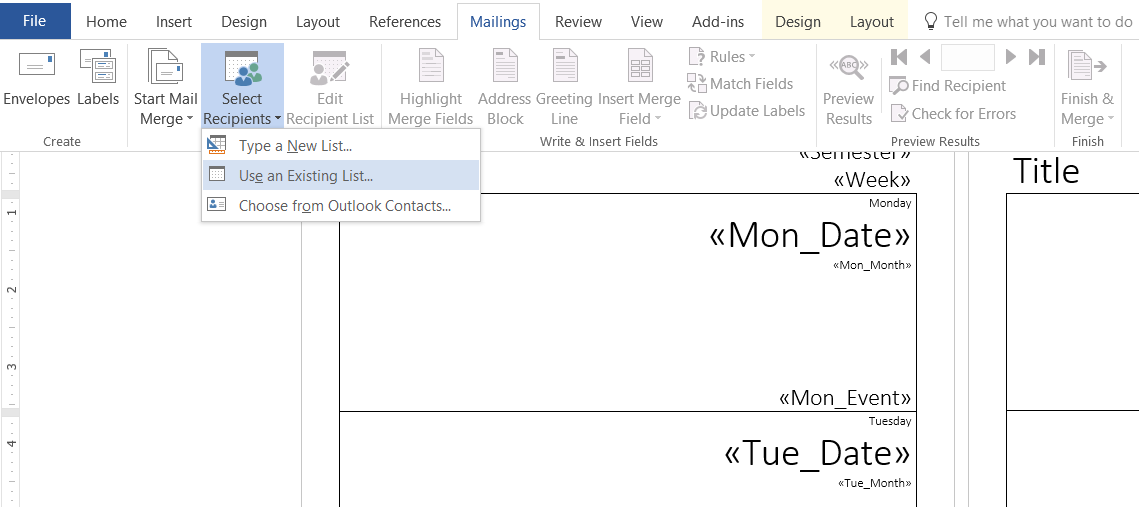
Step 4. Open it in Microsoft Word. You can edit it to your heart’s content, though probably the most important thing you need to do is find a cool font – I used Josefin Sans. Sarah will tell you how obsessed I am with that font (if its use on this blog didn’t make it obvious already.)

Step 5. Tell the document where to find the data file. Click on Mailings, Select Recipients, Use an Existing List. Navigate to where you saved the data file earlier.

If you wish, click Preview Results to see what your planner pages will look like.

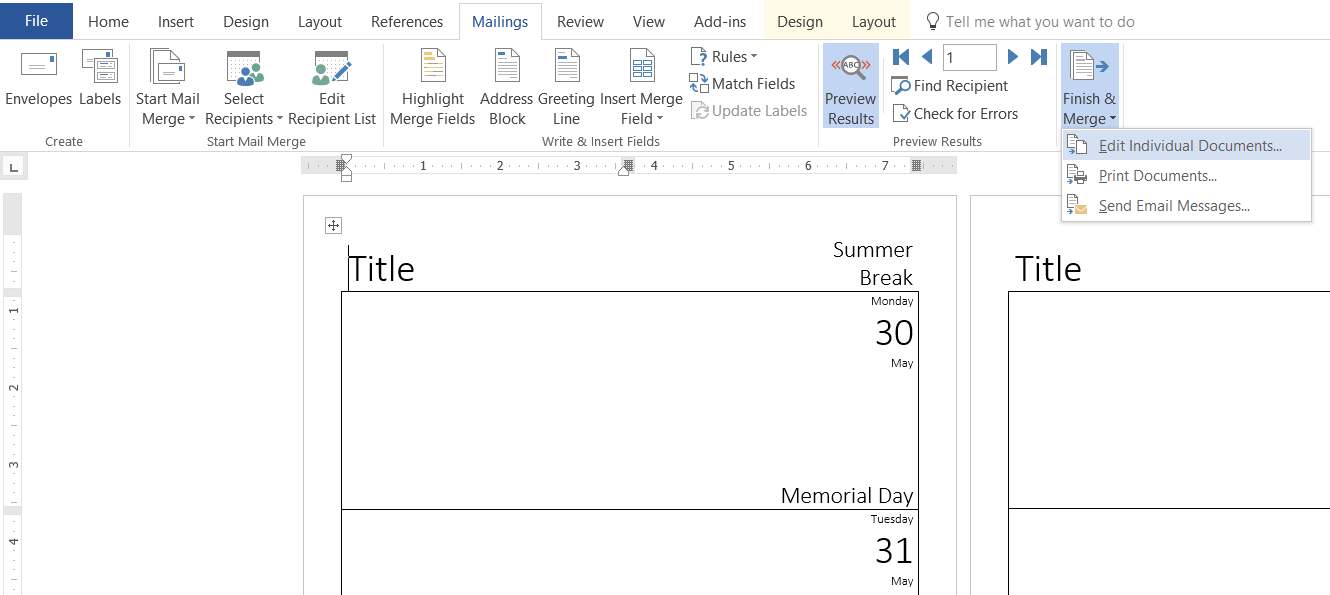
Step 6. Click Mailings, Finish & Merge, Edit Individual Documents. This will generate all the pages for you in a new document.

If you’re using a two page format, you’ll probably want to insert a blank page at the start, to make sure the two pages for a week are facing each other.

If you want my monthly calendar, you can download it here.

Please let me know if you use any of these and how you get on. If there’s enough interest, I’ll go to the effort to publish updated templates next year.